Updated July 2026

Photography by Pascale's Kitchen Studio
Good cooking starts long before anything goes into the pan — it begins with understanding your ingredients, knowing how to store them, and building the small habits that make everything in the kitchen run more smoothly. These are the tips I share most often in class and return to most frequently in my own kitchen: practical, straightforward and genuinely useful whether you are cooking for two on a weeknight or entertaining a crowd at the weekend. Think of this as your kitchen companion — something to dip into whenever you need a quick answer or a reminder of the basics.
EGGS
✦ To tell if an egg is fresh, place it in a bowl of cold water. If it sinks and lies flat it is very fresh. If it stands upright on the bottom it is older but still fine to eat. If it floats, discard it.
✦ Always bring eggs to room temperature before baking — cold eggs can cause butter to seize in cake batters and will prevent egg whites from reaching full volume.
✦ To separate eggs cleanly, crack them one at a time into a small bowl before adding to the main bowl — that way a broken yolk doesn't ruin a whole batch of whites.
BUTTER
✦ Unsalted butter is preferred for baking — it gives you complete control over the salt content of a recipe. Salted butter varies in salt content between brands and can throw off the balance of a delicate recipe.
✦ Butter absorbs odors easily — always store it well wrapped in the refrigerator, away from strongly scented foods like onions and garlic.
✦ Butter freezes beautifully for up to six months — buy in bulk when on sale and freeze in its original packaging. Move it to the refrigerator the day before you need it.
✦ Clarified butter — butter with the milk solids and water removed — has a much higher smoke point than regular butter, making it ideal for sautéing at high temperatures without burning. To clarify butter, melt it gently over low heat and skim the foam from the top, then pour off the clear golden liquid, leaving the white milk solids behind.
✦ Brown butter — beurre noisette — is one of the simplest and most transformative things you can do in a kitchen. Melt butter over medium heat and continue cooking, swirling occasionally, until the milk solids turn golden brown and the butter smells nutty and fragrant. It takes about 5 minutes and turns almost any dish it touches into something extraordinary. Use it over pasta, fish, vegetables or in cake batters.
✦ To soften butter quickly when you have forgotten to take it out of the refrigerator, cut it into small cubes and spread them on a plate — they will come to room temperature in 10–15 minutes rather than an hour.
CREME FRAICHE
✦ To make a quick and easy version of crème fraiche, combine equal amounts of heavy cream with sour cream in a bowl. Leave covered overnight on the kitchen counter. In the morning you’ll have a delicious crème fraiche mixture. Refrigerate it at this point. It is delicious with smoked salmon.
HERBS
✦ To keep fresh herbs longer in the refrigerator, treat them like flowers: trim the stems, place them upright in a glass with a small amount of water, cover loosely with a plastic bag and refrigerate. Basil is the exception — it hates the cold and is best kept at room temperature on the counter.
✦ To dry fresh herbs quickly for a recipe that calls for dried, spread them on a baking sheet and place in a low oven (200°F) for 20–30 minutes. Cool completely before using.
ONIONS
✦ To chop onions without tears, chill them in the refrigerator for 30 minutes before cutting. The cold reduces the release of the sulfur compounds that cause the eyes to water.
✦ Always leave the root end of the onion intact while chopping — it holds the layers together and makes for much cleaner, more controlled cuts.
GARLIC
✦ To peel garlic quickly, place a clove under the flat side of a chef's knife and press firmly with the heel of your hand. The skin will slip off easily.
✦ To remove the smell of garlic from your hands, rub them with the cut side of a lemon, or press them flat against the stainless steel surface of your sink under running water.
POTATOES
✦ Store potatoes in a cool, dark, well-ventilated place — a paper bag in a cupboard away from light is ideal. Never store them in the refrigerator — the cold converts the starch to sugar, which affects both the flavor and the way they brown when cooked.
✦ Never store potatoes near onions — both emit gases that cause the other to sprout and spoil more quickly.
✦ If your potatoes have begun to sprout, remove the sprouts before cooking — they contain solanine, a mildly toxic compound. If the potato itself is green beneath the skin, discard it.
✦ For the crispiest roasted potatoes, parboil them first until just tender, drain well and let them steam dry in the colander for a few minutes. Then rough up the surface by shaking the colander — the fluffy edges will crisp beautifully in a hot oven with olive oil and sea salt.
✦ For the smoothest mashed potatoes, always warm the butter and cream before adding them — cold dairy added to hot potatoes will cool the mash and make it gluey.
TOMATOES
✦ Never refrigerate ripe tomatoes — cold temperatures destroy their flavor and turn the flesh mealy. Store them at room temperature, away from direct sunlight, stem side down to slow ripening.
✦ If you have tomatoes that are not yet fully ripe, leave them on the counter at room temperature and they will ripen naturally within a few days. Placing them next to a banana speeds up the process — both fruits emit ethylene gas which encourages ripening.
✦ To peel tomatoes easily, score a small cross in the base of each one, drop them into boiling water for 30 seconds, then transfer immediately to a bowl of ice water. The skins will slip off effortlessly.
✦ To seed a tomato, cut it in half crosswise and gently squeeze each half over a bowl — the seeds and juice will fall out cleanly, leaving the flesh intact.
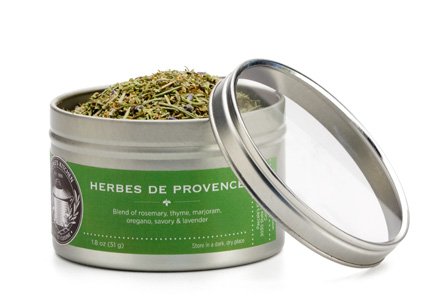
✦ Out-of-season tomatoes benefit enormously from slow roasting — halved, drizzled with olive oil and a pinch of Herbes de Provence, and left in a low oven (300°F) for an hour or two, they become concentrated and sweet in a way that raw winter tomatoes never are.
LEMONS
✦ To extract the most juice out of a lemon: First gently roll the lemon backwards and forwards on a counter top exerting a little pressure. Then slice the lemon in half. Holding the lemon over a small bowl, insert a fork into the one half. Using your left hand, squeeze and rotate the lemon away from you, whilst turning your right hand which is holding the fork towards you. As you rotate the two, the fork will extract loads of lemon juice. Repeat with the second half.
✦ Always zest a lemon before juicing it — once it has been juiced, the fruit is too soft and slippery to zest properly.
✦ If a recipe calls for both lemon juice and zest, use a microplane for the zest — it removes only the fragrant yellow surface without any of the bitter white pith beneath.
PANTRY ITEMS AND FOOD STORAGE
OLIVE OIL
✦ Store olive oil away from heat and light — both degrade the oil quickly. A cupboard away from the stove is ideal. Never store it on the counter next to the oven.
✦ Use your best extra virgin olive oil for finishing — drizzling over a finished dish, making vinaigrettes, and dipping bread. For sautéing and roasting at higher temperatures, a less expensive olive oil is perfectly fine.
SALT
✦ Not all salts are created equal — table salt, fine sea salt and coarse sea salt all have different densities, which means a teaspoon of one is not the same as a teaspoon of another. When a recipe calls for salt, taste as you go rather than following quantities blindly.
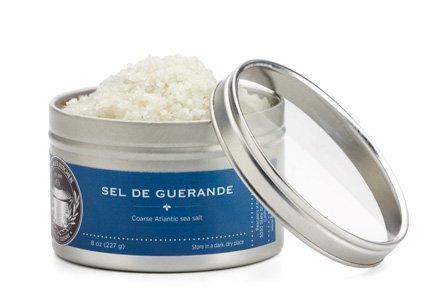
✦ Coarse sea salt is best for cooking — seasoning pasta water, rubbing into meat before roasting, and finishing dishes at the table. Fine salt dissolves more quickly and is useful for baking where you want it to incorporate evenly into a batter or dough.
✦ Fleur de sel and other finishing salts are best used exactly as the name suggests — as a finishing touch, sprinkled over a dish just before serving. Their delicate texture and flavor are lost if added during cooking.
✦ Salt draws moisture out of vegetables — if you are salting cucumber, zucchini or eggplant before cooking, leave them for at least 20 minutes, then pat dry thoroughly before proceeding.
✦ Store salt in a dry place away from steam — it absorbs moisture easily and will clump if kept near the stove or sink. A salt cellar or small jar with a loose lid is ideal for keeping salt you use daily within easy reach.
✦ Salt is a preservative as well as a seasoning — it is the reason brined and cured foods keep so much longer than fresh ones. When making preserves, pickles or ferments, always use the salt quantity specified in the recipe, as it plays a food safety role as well as a flavor one.
✦ Season in layers, not just at the end — adding a little salt at each stage of cooking builds depth of flavor in a way that salting at the table never can.
✦ Taste as you go. The only way to know if a dish needs more salt is to taste it — and to taste it again after you've adjusted.
FLOUR AND DRY GOODS
✦ Store all-purpose and bread flour in an airtight container in a cool, dry cupboard — it will keep well for up to 12 months. Kept in the freezer it will last indefinitely.
✦ Almond flour and other nut flours have a high fat content and go rancid quickly at room temperature. Always store them in an airtight container in the freezer — they will keep for up to a year and can go straight from frozen into recipes.
✦ Whole wheat flour and rye flour also have higher fat content than white flour and will go rancid more quickly. Store in the refrigerator for up to 3 months or in the freezer for up to 6 months.
✦ Spices lose their potency over time — most ground spices are best replaced after 12 months, whole spices after 2–3 years. To test whether a spice is still alive, rub a small amount between your fingers and smell it. If the aroma is faint or flat, it is time to replace it.
✦ Store dried pasta, rice, lentils and grains in airtight jars rather than in their original packaging — they keep longer, stay fresher, and make the pantry a pleasure to look at.
SUGAR
✦ Store sugar in an airtight container away from moisture — it absorbs humidity from the air and will harden into a solid block if left in an open bag.
✦ Brown sugar hardens quickly once opened. To soften it, place a damp paper towel in the container overnight, or put it in a low oven (250°F) for a few minutes. To keep it soft, store it with a terra cotta sugar saver disk or a piece of bread — both help maintain moisture.
✦ Powdered (confectioner's) sugar should always be sifted before use — it clumps easily and unsifted lumps in a frosting or sauce are almost impossible to smooth out after the fact.
✦ When caramelizing sugar, resist the urge to stir once the sugar has begun to melt — stirring encourages crystallization and will give you a grainy, seized caramel. Swirl the pan gently if you need to encourage even browning.
✦ Honey and maple syrup can be used as partial substitutes for sugar in many recipes, but they add moisture as well as sweetness, which will affect the texture of baked goods. When substituting, reduce the liquid in the recipe slightly and lower the oven temperature by 25°F — honey and maple syrup brown faster than sugar.
✦ Vanilla sugar is one of the simplest and most useful things to keep in the pantry — bury a used vanilla pod in a jar of sugar and leave for a week. The sugar will take on a beautiful vanilla fragrance and can be used in place of plain sugar in any dessert recipe.
FOOD PREP AND SAFETY
✦ The danger zone for bacterial growth is between 40°F and 140°F (4°C and 60°C). Hot food should be kept hot and cold food should be kept cold — never leave cooked food sitting at room temperature for more than two hours.
✦ Marinate meat, poultry and fish in the refrigerator — never at room temperature.
✦ Use separate cutting boards for raw meat and poultry and for vegetables and cooked foods. Color-coded boards make this easy to maintain consistently.
✦ Wash hands thoroughly with soap and water after handling raw meat, poultry or fish — not just a quick rinse.
✦ When in doubt, throw it out. The cost of a bout of food poisoning is far greater than the cost of the food you are unsure about.
✦ Leftovers should be cooled quickly and refrigerated within two hours of cooking. Divide large quantities into smaller containers to speed up cooling — a large pot of soup left to cool on the stove overnight is not safe to eat the next day.
✦ Thaw frozen foods in the fridge or in ice water – it sounds counter intuitive I know – but if the items thaw at room temperature, microbes can grow on the surface as that will thaw faster than the interior of item.
✦ To sanitize cutting boards, use a solution of 1 part distilled vinegar to 2 parts water. Mix together and scrub the boards. Dry the boards with a clean cloth and then leave to air dry.
✦ To get rid of hard water marks in a kettle or water jug, mix boiling water with vinegar (50/50) and let it sit for 5 minutes. The hard water marks and white scaling will then easily come off. The same goes for a dishwasher. If you have hard water, add ½ cup vinegar to the dishwasher each time you run it and your glasses will be clean – no more white film!